초심으로 돌아가서 MySQL 매뉴얼을 읽어보려고 한다.
오늘은 MySQL DB 설치에 대해 살펴볼 것이다.
버전은 5.7 기준으로 읽을 것이고, OS는 linux 기준으로 진행한다.
리눅스 중에도 redhat 계열이 친숙하기 때문에 (내 취향) centos를 사용한다.
영문 매뉴얼 문서를 번역한다는 개념이 아니라, 읽으면서 그간 경험했던 것이나 추가로 참고할 만한 자료는 직접 노트에 포스트잇 붙이듯 내용을 덧붙여 둘 것이다.
https://dev.mysql.com/doc/refman/5.7/en/binary-installation.html
테스트 환경
- OS: centos7
- DB: MySQL 5.7
MySQL 다운로드
MySQL을 설치하는 방법은 꽤 다양하다.
나는 MySQL 5.7 Community 버전을 바이너리 버전으로 다운로드 받은 후, 리눅스(CentOS)에 설치할 것이다.
MySQL Community Server 다운로드 받기 https://dev.mysql.com/downloads/
단지 내가 가장 선호하는 방법일 뿐이다.
그 외에 yum 방식이나 rpm 설치, source를 직접 컴파일 해서 사용하는 방법도 있다.
물론 docker로도 간단히 띄울 수 있다. (크으)
https://dev.mysql.com/doc/refman/5.7/en/getting-mysql.html
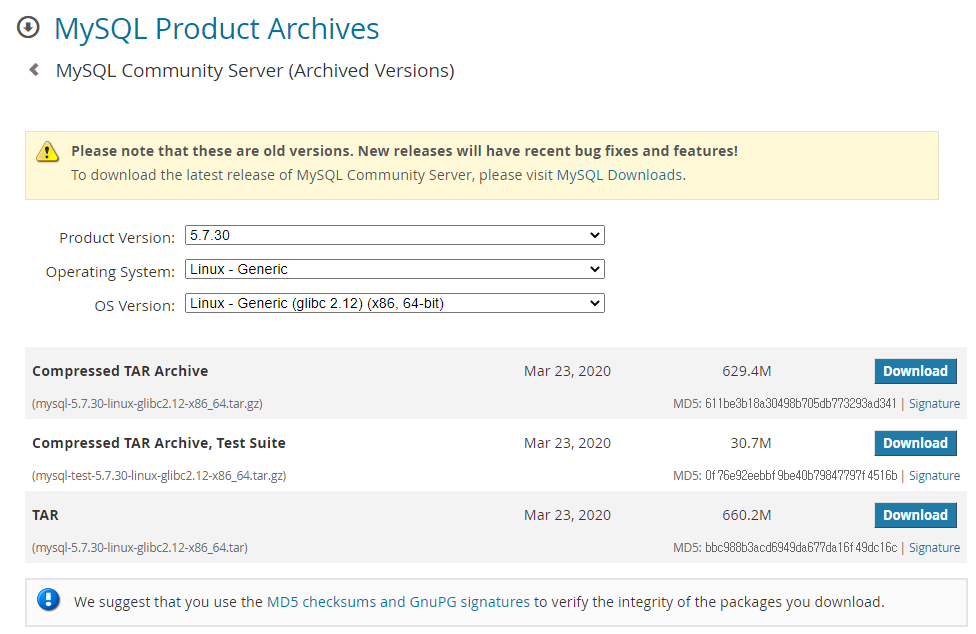
최신 GA 버전이 MySQL 8 이기 때문에, 그냥 다운로드 화면으로 진입하면 MySQL 8을 다운로드 받게 된다.
Archived 메뉴로 가서 5.7 버전을 찾아 다운로드 받았다.
설치할 리눅스 서버가 외부 인터넷이 가능한 환경이라면, wget으로 바로 내려받으면 더 편리하게 다운로드 받을 수 있다. (설치 파일을 서버에 upload 하는 과정이 생략되기 때문)
## MySQL community server 5.7.30 다운로드
wget https://downloads.mysql.com/archives/get/p/23/file/mysql-5.7.30-linux-glibc2.12-x86_64.tar.gz
GA?
정식 버전 선언이 된 것을 GA 된 버전이라고 하고, General Availability의 약자이다.
MySQL 5.7 버전의 GA 현황은 릴리즈 노트에서 확인할 수 있다.
버그 패치 등의 정보도 릴리즈 노트에서 확인할 수 있는 만큼, 운영 중인 버전 정보나 상위 버전에 대한 릴리즈 노트를 종종 찾는 것은 좋은 습관이라고 생각한다.
MySQL 5.7 Release Notes
https://dev.mysql.com/doc/relnotes/mysql/5.7/en/
설치 전 주의사항
리눅스 바이너리 버전 설치 매뉴얼 페이지(https://dev.mysql.com/doc/refman/5.7/en/binary-installation.html)에 진입했더니, warning 박스가 보인다. 주의하라고 하니 읽어보자.
- Yum이나 APT를 이용해서 OS에 이미 설치했던 적이 있다면, 바이너리 설치 시 문제가 있을 수 있다. 패키지 관리 시스템을 이용해 이전 MySQL을 완전히 지워야 한다. 부가적인 파일이나 이전 데이터 파일도 지워야 한다. my.cnf 같은 컨피그 파일도 지워야 한다.
- MySQL은 libaio 라이브러리 dependency가 있다. 해당 라이브러리가 설치되어 있지 않으면 데이터 디렉토리 initialization 단계나 이후 서버 시작 단계에서 실패하게 된다. 필요하다면 적절한 패키지 매니저를 이용해 라이브러리를 설치하자.
# yum 방식
shell> yum search libaio  # search for info
shell> yum install libaio # install library- 5.7.19 이상 버전: NUMA(Non-Uniform Memory Access)가 generic Linux build에 추가되었으며, libnuma 라이브러리 dependency가 있다. 시스템에 설치되어 있지 않다면 패키지 매니저를 이용해 설치하자.
우선 지금 진행하고 있는 환경에 대한 내용만 번역해보았다.
apt-based 환경과 SLES 11(SUSE Linux Enterprise Server) 사용자라면 매뉴얼에서 추가 주의사항을 확인하도록 한다.
설치 전 세팅
타르볼 압축 해제
다운로드 받은 파일을 서버에 업로드 해주자.
설치 경로는?
각 사 정책이 이미 있을 수도 있고, 개인이 원하는 경로가 있을 수도 있다.
입맛에 맞게 지정해도 상관없고, 일단 오늘은 매뉴얼을 읽기로 했으니 매뉴얼 그대로 /usr/local 로 해본다.
다운로드 받은 타르볼이 다른 경로에 가있다면 /usr/local로 옮겨(mv) 주자.
그리고 압축을 풀어준다.
# 경로 이동
shell> cd /usr/local

# 압축 해제
shell> tar zxvf /usr/local/mysql-VERSION-OS.tar.gz
심볼릭 링크 걸기
심볼릭 링크를 걸어주자. 바로가기 같은 개념이다.
# 심볼릭링크 지정
shell> ln -s full-path-to-mysql-VERSION-OS mysql
심볼릭 링크를 걸어주면 패치 적용이나 업그레이드/다운그레이드 할 때 용이하다.
경로가 간단해져서 접근하기도 편리하다.
OS 유저 생성
MySQL용 OS 유저를 생성한다.
# OS 계정 설정
shell> groupadd mysql
shell> useradd -r -g mysql -s /bin/false mysql
파일 권한 설정
주요 경로 권한을 부가적으로 설정해준다.
사실 데이터파일, 로그 위치는 실 서비스 DB 서버의 경우 별도로 마운트 하여 사용하기 때문에 엔진 하위 경로로 두지는 않지만, 지금은 간단하게 설치 테스트하는 것이 목적이기 때문에 엔진 경로 하위로 모두 모아서 설치했다.
# 관련 디렉토리 생성 및 권한 설정
shell> cd /usr/local/mysql

# 로그 디렉토리 경로 설정
shell> mkdir mysql-log
shell> chown mysql:mysql mysql-log
shell> chmod 750 mysql-log

# 로그 (깡통) 파일 생성
shell> cd mysql-log
shell> touch mysqldb.log
shell> chown mysql:mysql mysqldb.log
로그 파일을 만들어주지 않으면 어떤 일이 벌어질 수 있나?
http://www.dark-hamster.com/database/how-to-solve-error-message-mysqld_safe-error-log-error-set-to-mysql-error-log-however-file-dont-exists-create-writable-for-user/
설치
DB 서버 initialize
initialize의 적절한 번역을 고민해보다, initialize는 그대로 두는 게 더 와 닿는 것 같아서 그대로 두었다.
혹시 아이디어가 있으신 분은 고견을 주십ㅅ....
이 설치 매뉴얼 페이지에는 my.cnf(컨피그파일) 설정하는 것에 대한 내용이 별도로 없는 것으로 보인다.
매뉴얼대로 진행하게 되면 데이터파일, 로그, 소켓 등 모든 것이 기본 패스로 설치된다.
몇 가지 패스만 간단하게 설정해놓고 진행해보자.
# 경로 이동
shell> cd /usr/local/mysql

# vi로 오픈 (은 취향껏..)
shell> vi my.cnf


################### my.cnf ###################

[mysqld]
datadir=/usr/local/mysql/mysql-data
#socket=/tmp/mysql.sock ## 지정하지 않으면 소켓은 tmp에 생긴다

# Disabling symbolic-links is recommended to prevent assorted security risks
symbolic-links=0

[mysqld_safe]
log-error=/usr/local/mysql/mysql-log/mysqldb.log
pid-file=/usr/local/mysql/mysql-log/mysqldb.pid
datadir https://dev.mysql.com/doc/refman/5.7/en/server-system-variables.html#sysvar_datadir
socket https://dev.mysql.com/doc/refman/5.7/en/server-system-variables.html#sysvar_socket
symbolic-links https://dev.mysql.com/doc/refman/5.7/en/server-options.html#option_mysqld_symbolic-links
log-error https://dev.mysql.com/doc/refman/5.7/en/server-system-variables.html#sysvar_log_error
pid-file https://dev.mysql.com/doc/refman/5.7/en/server-system-variables.html#sysvar_pid_file
자 이제 initialize 하게되면...
# DB 초기 기동
shell> bin/mysqld --defaults-file=/usr/local/mysql/my.cnf --initialize --user=mysql
shell> bin/mysql_ssl_rsa_setup --defaults-file=/usr/local/mysql/my.cnf
아래와 같은 무서운 로그가 찍힌다.
2020-07-28T07:11:57.989436Z 0 [Warning] TIMESTAMP with implicit DEFAULT value is deprecated. Please use --explicit_defaults_for_timestamp server option (see documentation for more details).
2020-07-28T07:11:58.270389Z 0 [Warning] InnoDB: New log files created, LSN=45790
2020-07-28T07:11:58.320197Z 0 [Warning] InnoDB: Creating foreign key constraint system tables.
2020-07-28T07:11:58.382053Z 0 [Warning] No existing UUID has been found, so we assume that this is the first time that this server has been started. Generating a new UUID: a02cbe4d-d0a1-11ea-95e9-080027a15213.
2020-07-28T07:11:58.383950Z 0 [Warning] Gtid table is not ready to be used. Table 'mysql.gtid_executed' cannot be opened.
2020-07-28T07:11:59.427204Z 0 [Warning] CA certificate ca.pem is self signed.
2020-07-28T07:11:59.589653Z 1 [Note] A temporary password is generated for root@localhost: uk5qHajEXy-D
는 실은 그리 무섭지는 않다. (??)
5.7 이전 MySQL DB 버전을 사용했다면 MySQL 5.7 버전 설치 과정이 다소 생소하게 느껴질 것이다.
커멘드부터 다르고,
root 초기 임시 암호가 자동 생성되어 제공되는 점 또한 새로운 점이다. (임시 비밀번호는 잘 챙겨두자)
initialize 관련 추가 정보 매뉴얼 페이지
https://dev.mysql.com/doc/refman/5.7/en/data-directory-initialization.html#data-directory-initialization-overview
symbolic-links 관련 추가 정보 매뉴얼 페이지
https://dev.mysql.com/doc/refman/5.7/en/symbolic-links-to-tables.html
DB 서버 startup
이제 거의 완료되었다. DB 서버를 띄워보자.
# DB 서버 올리기
bin/mysqld_safe --defaults-file=/usr/local/mysql/my.cnf --user=mysql &
정상적인 상태라면 아래와 같은 로그가 화면에 출력된다. (문제가 있으면 DB가 뜨다가 다시 내려갈 것이다.)
2020-07-28T07:44:33.900904Z mysqld_safe Logging to '/usr/local/mysql/mysql-log/mysqldb.log'.
2020-07-28T07:44:33.917903Z mysqld_safe Starting mysqld daemon with databases from /usr/local/mysql/mysql-data
아직 안심이 되지 않는다면 DB가 잘 떠있는지 더 확인해보자.
# mysqld 데몬 확인
shell> ps -ef | grep mysqld
MySQL Server인 mysqld와
mysqld를 기동시킨 mysqld_safe가 잘 보이면 정상이다.
mysqld_safe
https://dev.mysql.com/doc/refman/5.7/en/mysqld-safe.html
로그도 확인해보자.
# 로그 확인하기
shell> cd mysql-log
shell> tail -10 mysqldb.log

2020-07-28T07:44:34.180204Z 0 [Note] Skipping generation of RSA key pair as key files are present in data directory.
2020-07-28T07:44:34.180388Z 0 [Note] Server hostname (bind-address): '*'; port: 3306
2020-07-28T07:44:34.180414Z 0 [Note] IPv6 is available.
2020-07-28T07:44:34.180419Z 0 [Note]   - '::' resolves to '::';
2020-07-28T07:44:34.180431Z 0 [Note] Server socket created on IP: '::'.
2020-07-28T07:44:34.180815Z 0 [Note] InnoDB: Loading buffer pool(s) from /usr/local/mysql-5.7.30-linux-glibc2.12-x86_64/mysql-data/ib_buffer_pool
2020-07-28T07:44:34.181860Z 0 [Note] InnoDB: Buffer pool(s) load completed at 200728 16:44:34
2020-07-28T07:44:34.186805Z 0 [Note] Event Scheduler: Loaded 0 events
2020-07-28T07:44:34.186877Z 0 [Note] /usr/local/mysql/bin/mysqld: ready for connections.
Version: '5.7.30'  socket: '/tmp/mysql.sock'  port: 3306  MySQL Community Server (GPL)
ready 되었단다. DB는 잘 떠있다.
패스 설정
설치의 필수 코스는 아니지만, 해두면 편한 것이 패스 설정이다.
mysql의 bin 경로를 패스 등록해두면, 굳이 긴 패스를 입력할 필요 없이 mysql 클라이언트 이용이나 mysql 관련 유틸리티를 쉽게 접근할 수 있게 된다.
# 패스 지정하기
shell> export PATH=$PATH:/usr/local/mysql/bin
패스 외에도 profile에 alias를 설정해서 사용하는 것도 편리하게 사용할 수 있는 팁 중 하나이다.
mysql_config_editor도 편리함을 높여주는 유틸리티 중 하나이다.
mysql_config_editor
https://dev.mysql.com/doc/refman/5.7/en/mysql-config-editor.html
관리자 암호 변경
# DB 접속
# MySQL 홈 디렉토리로 이동 후 실행 (혹은 패스를 잡았다면 바로 mysql 접속)
shell> bin/mysql -uroot -p
Enter password:
Welcome to the MySQL monitor. Commands end with ; or \g.
Your MySQL connection id is 2
Server version: 5.7.30
Copyright (c) 2000, 2020, Oracle and/or its affiliates. All rights reserved.
Oracle is a registered trademark of Oracle Corporation and/or its
affiliates. Other names may be trademarks of their respective
owners.
Type 'help;' or '\h' for help. Type '\c' to clear the current input statement.
mysql>
mysql>
# mysql.user 계정을 접속하니 에러가 발생한다. root 암호가 임시 패스워드이기 때문에 변경하라고 뜬다.
mysql> select * from mysql.user;
ERROR 1820 (HY000): You must reset your password using ALTER USER statement before executing this statement.
# root 암호를 변경해준다.
mysql> alter user 'root'@'localhost' identified by '신규패스워드';
Query OK, 0 rows affected (0.00 sec)MySQL 루트 유저 패스워드 리셋하기
https://stackoverflow.com/questions/33467337/reset-mysql-root-password-using-alter-user-statement-after-install-on-mac
끝!
오늘은 간단하게 MySQL DB (5.7 ver) 를 설치하는 방법에 대해 공식 매뉴얼을 기준으로 살펴보았다.
+ 그 외 특이사항
error while loading shared libraries: libncurses.so.5
이 포스팅은 centos에서 테스트 후 작성한 페이지 이지만, ubuntu 환경에서 위 방법대로 설치하고 mysql client로 접속 시 아래와 같은 에러를 만날 수도 있다.
bin/mysql -uroot -p
bin/mysql: error while loading shared libraries: libncurses.so.5: cannot open shared object file: No such file or directory
💡 해결 방법: 아래와 같이 요구하는 라이브러를 설치하면 정상적으로 접근할 수 있다.
# 위 에러를 해소하기 위해 필요한 패키지 설치
apt-get install libncurses*| 날짜 | 내용 |
|---|---|
| 2020.09.23 | 최초 글 작성 |
| 2021.07.21 | 글 해당 공간으로 복제 |
| 2021.10.03 | ubuntu 환경 libncurses.so.5 관련 이슈 추가 |
| 기본 테스트 환경 정보 추가 |